Showing posts with label cutlery. Show all posts

Friday, October 04, 2024

New Sheath for the Cattaraugus 225Q Quartermaster Knife

The replica sheath that I ordered from eBay seller "banddinsidethegoldmine" arrived today. It's a pretty close replica of the original sheaths. Here's a pic with the knife in the replica sheath next to the original that it came with. After I took the pic I applied some neatsfoot oil, which darkened it a bit, as expected.


The seller also has right handed sheaths, but since I'm left handed I stuck with the historically correct lefty sheath.


Monday, September 30, 2024

Cattaraugus 225Q "Quartermaster" Knife

Last week I started reading up on the Cattaruagus 225Q "Quartermaster" knives that were produced for the US military during World War 2. My interest was piqued so I went online looking for one as a user.

Up until fairly recently they were available for $50 or less but as with everything else, prices have gone up. I found this one on eBay and was able to get it for $90 + tax and shipping. It arrived today.


For a knife made about 80 years ago it's in extremely nice shape. The carbon blade is free from serious corrosion or pitting and shows signs of only light use. It came with a nice, sharp edge, too.

The stacked leather washer handle is also in very nice condition. It bears the typical random grooves found on my 225Qs, intended to enhance one's grip. The pommel is tight and doesn't show any signs of being used as a hammer. Overall the hilt is tight. I've applied a few light coats of Fiebing's 100% neatsfoot oil and the washers have soaked it up. I'll add some more and then give it a coat of Sno-Seal, which is mostly beeswax.

On the other hand, the sheath is showing its age and for that reason I have a replica on the way for actual use. I've given it a couple light coats of neatsfoot oil and like the knife's handle, it's drinking up the oil.

The 225Q has a 6" blade with a swedge on the back of the tip, but it's not sharpened. The blade is 3/16" thick at the spine and a hair under 1.3" wide. The small guard shouldn't get in the way of use in woodcraft or dressing game.

The blade shape is very similar to my Varusteleka Terävä Jääkäripuukko 140, which I've used to process a few deer. I'd expect the Cattaruagus to perform similarly to the Finnish knife.

For size references, here's the Cattaraugus flanked by a Mora Kansbol and a Case Stockman.


As a contemporary of the USN Mk.2 fighting knife, AKA the "Kabar," it invites a comparison. The 225Q's blade is an inch shorter but a little thicker. I like the feel much better than the more famous Kabar. Likewise, the blade geometry on the 225Q makes it a better field knife than the later USAF Aircrew Survival Knife, AKA the "bolt knife". (Having used a USAF knife in the field, I am not a fan of it.)

I'm looking forward to taking this knife into the woods and using as it was intended to be.


Tuesday, October 26, 2021

SwissQlip Pocket Clip for Swiss Army Knives

Over the years, I've owned several multitools from Gerber, Leatherman, and Victorinox. However, for my needs I've found that a Swiss Army Knife is far more useful and easier to carry.

For my needs, a SAK is also more useful than a pocket knife that's just a knife. I  use the other tools on a SAK as much or more than the cutting blade.

I've carried several SAKs, starting with a Victorinox Pioneer that I bought around 1981 for $13 at Herter's Cutlery at the King of Prussia Mall. (This was the first knife I bought and I still have it.)

One thing I haven't cared for is how SAKs eventually wear a hole in my pants pocket. I've found a couple solutions to that.

The first is attaching the knife via its keyring to a short lanyard looped around a belt loop. I made the lanyard just long enough to hold the knife vertically in my pocket. The lanyard has a plastic clip that allows me to easily detach and reattach the knife to it. Naturally, this requires the use of both hands but the SAK needs that to open any of the blades or tools anyway.

More recently I discovered the SwissQlip, an add-on pocket clip for most 91mm SAKs. (Check the list of supported SAKs at the link.) It attaches to the knife using the keyring's mounting hole, after you remove the ring.

I installed one on a Victorinox Fieldmaster. Small screws like the SwissQlip's attachment screw often have a tendency to loosen, so I put a drop of blue Loctite on it before screwing it in.


I've been carrying the Fieldmaster fitted with the SwissQlip now for a couple months and it works well, with a couple caveats.

First, it does block easy access to the tweezers. To get the tweezers out you need to use the toothpick to pry it up to the point where you can grab it.

Second, it also blocks access to the package hook unless you use something else like a small screwdriver to pry it open. This I don't care about since I have never used the package hook on any of my SAKs.

I'm willing to put up with these two things because overall the SwissQlip makes the SAK easier to carry. It's held securely to my pocket and has just the right amount of tension to keep it in place while still remaining easy to reinsert into my pocket.

I haven't found that the SwissQlip gets in the way when using the knife.

At $20 it's not exactly cheap but it is well made and functional. It's a worthwhile addition to a SAK.


Sunday, August 04, 2019

Friday, December 28, 2018

H&B Forge Medium Camp Hawk and a Neck Knife

Today I took a spin up to Dixon's Muzzleloading Shop and came home with these:


The tomahawk is an H&B Forge Medium Camp Hawk while the knife one made by a local 'smith from an old trap spring. There are usually several of them on the shelf at Dixon's.

The Medium Camp Hawk's head weighs about a pound and has a hardened hammer poll, which should be useful for hammering in tent stakes. The edge is about 3.5" wide and the handled measures 19" long. The handle is stained but doesn't appear to be sealed so I'll give it a coat or two of some oil.

It came with a usable edge but I'm going to sharpen it some more. I'm also planning to make a mask for it since it came without any cover.

The knife blade is about 3.75" long and measured 0.055" or 1.4mm thick with my calipers. It's stamped with the maker's initials, "JBG." The scales are curly maple, secured with four brass pins. Wood to metal fit is excellent.

The leather neck sheath reminds me a bit of a center seam moccasin and is nicely stitched. The thong doesn't have a quick release but if it got snagged on something I'd expect it to let go. The knife and sheath together weigh only a few ounces and hang comfortably.

They should make nice additions to my bushcraft kit.


Monday, July 09, 2018

Made a Stropping Block

Today one of my friends on Facebook posted a link to an article on the A.G. Russell Knives website,
How to Make a Finishing Paddle.

Coincidentally, yesterday I put together my first stropping block/finishing paddle with a piece of leather glued to a piece of wood. Even though I've been sharpening knives for close to four decades, I only started using a strop in the last couple of weeks. I immediately noticed a difference in my knife edges.

That's been a real oversight on my part, because a strop can help you get a really sharp edge on a knife, and polish the bevel, which has a couple benefits. First, it reduces drag in the cut, and second, it makes the edge a little more corrosion-resistant because the smooth surface is less prone to retaining moisture.

Some pictures. First, the stropping block before I applied any compound.


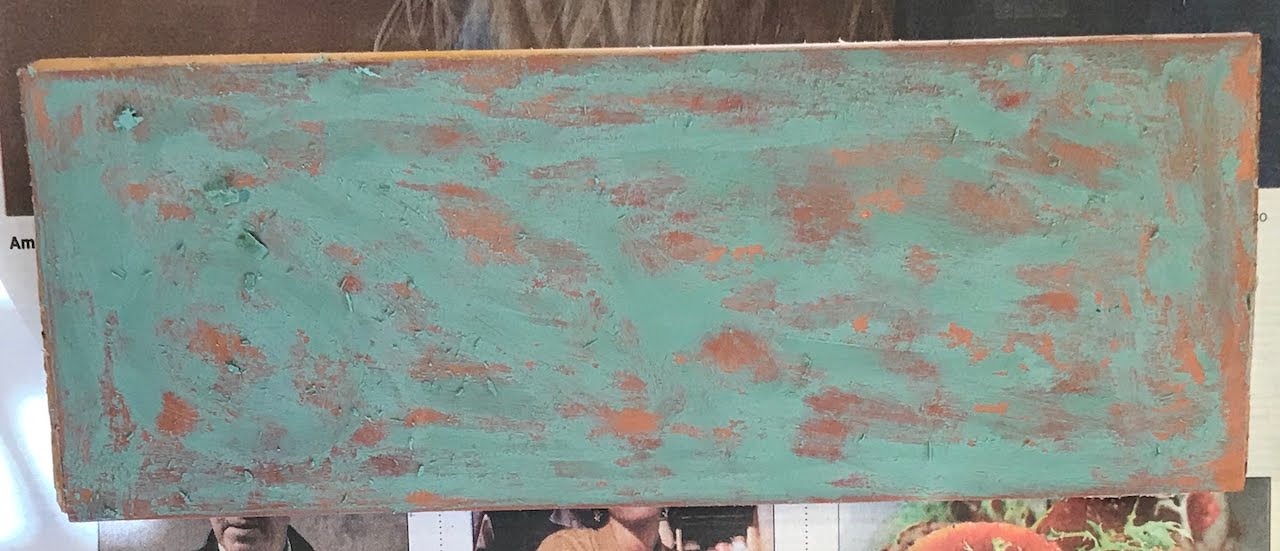
Second, after applying the green compound from Eastwood. As you can see, it didn't go on evenly. I should probably have sanded the block to ensure it was as level as possible, and then sanded the leather also. Oh well, it's a learning process.


Finally, what it looks like after a little use. The dark spots are where it removed metal from the knife.


It may not look like much but it helped get a few of my knives really sharp. E.g., my Cold Steel Bushman feels like a razor now.

I made this one from some cowhide I had laying around that was about 1/8" thick, and a piece of a scrap 2x4. The thick base helps provide clearance so you don't hit your knuckles on your workbench.

I may go back and tweak it by scraping off most of the compound, adding some mineral oil to the leather, slightly roughing the leather so it takes the compound better, and then reapplying the compound.

My brother requested that I make him one and I'll use the lessons learned with this one in doing so.

If you don't have the materials for making one yourself laying around like I did, and want to try using a stropping block, you can get one off Amazon, here.


Sunday, July 08, 2018

Camillus TL-29 Electrician's Knife

I picked up this old Camillus electrician's knife off eBay for a whopping $11.50 shipped.


Generations of American servicemen have known this style of knife as the "TL-29." They were typically paired with a set of linesman's pliers and leather belt pouch to hold both items. Below is a picture I found on Pinterest, apparently scanned from a US military manual.


Used TL-29s can be found on eBay for little money and newly-made ones are available from Klein and other manufacturers.

According to the tang stamp guide found here, the knife was made between 1960 and the late 1970s.

It showed signs of use and some neglect, but no outright abuse. E.g., it was dull, dirty, and had some rust which I removed by an overnight soak in Evaporust. The blades snap into position nicely with positive half-stops and no side-to-side wiggle. The brass liner lock positively keeps the screwdriver in the open position.

As I received the knife it was very dull but now it's shaving sharp. It took about an hour's worth of work on my DMT fine diamond bench stone and Worksharp Field Sharpener combined to put a good edge on it.

I plan to keep the edge on the screwdriver blade relatively dull for use as a scraper; it was originally intended as such and as a wire stripper. I expect it to throw sparks from a ferro rod rather well.

Worksharp Field Sharpener

In the past couple of weeks I’ve been on a cutlery buying binge. I received a nice Amazon gift card for my birthday at the end of May, and among the items I bought was a Work Sharp Field Sharpener.

The Worksharp Field Sharpener is an impressive little piece of gear for maintaining knives in the field or at home. It comes with coarse and fine diamond plates, a ceramic stick for honing, a small ceramic stick for working on serrations, and a leather strop. Built into the unit are guides to help you set the correct angle when using all of the sharpening bits.

Since receiving the Worksharp I’ve used it to touch up several pocketknives both old and new, and it’s enabled me to put shaving-sharp edges on them while sitting in my recliner.

The overall length is a bit under 7 inches, so it’s best used on smaller knives. Of course, you can use it on larger blades but you’ll need to work on shorter sections of the edge at a time. For scale, here it is next to an old Camillus TL-29 electrician's knife:


I plan to take the Worksharp with me on camping trips as my field edge maintenance solution. I might even get a second one to leave in my camping toolbox.

Sunday, August 07, 2016

Day Camp and Gear Discussion Video

On Friday I took a day trip up to the Conrad Weiser State Forest near Port Clinton, PA. In the video I demonstrate making a poncho lean-to shelter, discuss knife selection, provide a brief overview of the Hill People Gear Recon Kit Bag and Tarahumara pack, and make some coffee in an Esbit cookset.


I am trying to make and post more videos to my YouTube channel as I have time. Please hit the Like button and subscribe.