Showing posts with label machining. Show all posts

Friday, January 12, 2024

Got a Lathe Spider

A couple weeks ago I ordered a spider for my 7x14 minilathe, something I should have bought years ago. Little Machine Shop had it as their weekly special so I finally pulled the trigger on it.

Link to minilathe spider: https://littlemachineshop.com/products/product_view.php?ProductID=1136

The spider threads onto the end of the spindle and provides additional support to long workpieces, to prevent them from whipping around.


To install the spider you remove the gear cover on the end of the headstock and simply thread it onto the end of the spindle.


I used it today while drilling and tapping the flared end of the factory ramrod that came with my Investarm Gemmer Hawken. Even though I bought an unbreakable Delrin rod for it from Track of the Wolf, which is threaded on both ends, I want to keep the OEM wood rod as a spare.

This shows the ramrod mounted through the spindle bore.


And here I was using the lathe as a tapping guide to keep the 10-32 tap straight. I did not do this under power. Instead, I used the chuck key as a handle and rotated the chuck manually. Power to the lathe was off when I did this.


Aside from drilling and tapping the end of the OEM ramrod to accept 10-32 accessories like cleaning jags, worms, and bullet pullers, both ends of both rods got drilled and cross-pinned. To drill the holes I used my minimill.

Always cross-pin your ramrod tips! Failing to do so can result in the ends pulling off the rod if you get a jag stuck or need to pull a ball. It's simple to do so:

  1. Drill a hole through the rod crossways. I used a #40 drill because for my pin I used some brass rod 0.098" in diameter.
  2. Chamfer both ends of the hole.
  3. Drive the rod through the hole and cut it off. I used side cutters.
  4. Using a hammer, peen over both ends on a metal surface. I used the anvil on my bench vise.
  5. File the ends of the pin smooth.
One end of the Delrin rod from Track is tapped 10-32 and the other is 8-32. I will use 10-32 jags, etc. and have an aluminum T-handle with an 8-32 stud on the end. I have qualms about using it for cleaning or ball pulling.

Just another example of how my small, tabletop machines help me out with gunsmithing tasks.

Sunday, May 07, 2023

Made a Couple of Brass Drifts

This afternoon I went out to the shop and made a couple drifts from some square brass stock, for use with Colt-style percussion revolvers and also rifles on which the barrel is held on with a key or keys.


Naturally, I could have made these with a file but a milling machine, even a small one like my Grizzly G8689 makes it a lot easier. Don't ever let anyone tell you the table top machines are useless.


Sunday, April 30, 2023

Installing a New Front Sight on a Pietta 1851 Navy

Several years ago I bought a Pietta 1851 Navy Sheriff's Model .44 caliber percussion revolver. It's strictly a fantasy gun in that Colt never made an 1851 Navy with this short a barrel, nor did they make them in .44. All real Colt Navy revolvers are .36s, with the exception of a very few experimental .40 caliber guns. Regardless, it's a fun little gun but severely handicapped by the factory front sight, which is a miniscule brass cone that's both hard to see and too short, resulting in the gun shooting very high at pistol ranges.

So today, I fixed that by cutting a dovetail in the barrel and installing a taller blade front sight that I'll be able to actually see and also can file to zero the piece.

Here's what the factory front sight looked like, along with the rifle front sight I modified to use:


I have a Grizzly G8689 mini mill. I first used it with a 1/8" end mill to cut the old sight flush with the barrel. Then I cut a slot a bit less than the width of the top of the front sight base. I cut the slot 0.07" deep to match the thickness of the front sight. (The mill has digital readouts fitted to allow me to make precise cuts.)


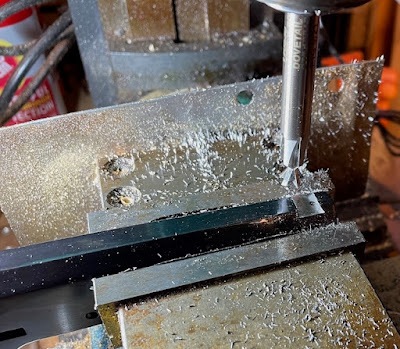
Then I used a 3/8" dovetail end mill to turn it into a dovetail. You can see the factory hole for the original front sight in the dovetail.


Using a couple files and trial and error, I fit the new sight to the barrel.


I left it extra tall so that I can use a file to raise the point of impact to the point of aim. I'll probably zero it with a load of a .454 ball on top of 30 grains of 3Fg black powder. After it's zeroed I will shape the front of the blade and cold blue it.

Aside from the front sight I plan to slightly enlarge the rear sight notch in the hammer nose, and replace the factory nipples with Tresos that have small flash holes for less blow back and cap fragmenting. An accessory I plan to make is an extension to slip over the loading rod for better leverage. That's not needed on the full length guns but this will benefit from that. Those without machine tools can purchase one from Slix Shot.


Saturday, October 15, 2022

Made an aluminum field rod for my Cabela's Hawken

I wanted a ramrod that was a bit longer than my Cabela's Hawken's 29" barrel, and one I won't have to worry about breaking in the field. I rummaged around in my shop and found a piece of aluminum rod that was 36" long x 3/8" diameter, the same as the factory wood rod.

I put the rod in the bore and then marked it a few inches about the muzzle then cut it off with a hacksaw. Then I used my lathe to face the ends, then drill and tap each end to accept 10-32 threaded accessories like cleaning jags, worms, and ball screws. Finally, I sanded it with some 220 grit sandpaper so that it's smooth but not too shiny.

The aluminum rod is slightly heavier than the wood rod but not nearly as much as a brass rod would be.

Testing my threading job with a .58 caliber jag that was on my workbench:


With a long .50 caliber jag on the end it sticks out several inches, to give me a decent grip:


And finally, stowed in place under the rifle. I'll keep the jag in my shooting pouch when in the field.


By drilling and tapping both ends I can affix an extension or T-handle to one and a jag or ball puller to the other.

The primary use for this rod will be when hunting. I use a thinner, stainless steel range rod with a muzzle guide when practicing. I might use it if I even shoot on a woods walk.

This is another example of why it's handy to have a small lathe and some drills and taps if you're a shooter.

Sunday, June 28, 2020

Removing Stubborn Screws from an Uberti 1866 Sporting Rifle

AKA, "When I said get out, I wasn't asking."

Earlier this year I bought an Uberti 1866 Sporting Rifle chambered for .38-40 WCF. Uberti build beautiful guns but unfortunately, many of them seem to be assembled by a gorilla who applies 87,000 pound-feet of torque to screws that are slightly harder than cheese.


This rifle is one of them.

I wanted to remove the sideplates from the action to inspect the inside and lubricate it with Ballistol. I also wanted to replace the loading gate cover (AKA ladle) with a stronger, aftermarket piece.

After weeks of soaking in Kroil, I was able to remove the lever screw. However, I still couldn't budge the sideplate screw. Even though I used a properly fitting gunsmith screwdriver bit, all I managed to do was booger the screw head.

A few weeks ago I ordered a set of replacement screws that are properly hardened from VTI Gun Parts. (Part # 220-H.)

So, today I braved the hot, humid Southeastern Pennsylvania weather and went out to my backyard shop so I could use my Grizzly G8689 mini-mill as a drill press.

First, I drilled into the sideplate screw on the end where it screws into the right sideplate. This relieves some pressure on the threads.

Note the use of a center drill for starting the holes. This is important because they are more rigid than twist drill bits and you don't want the bit walking off to the side and damaging the receiver.


Then I flipped over the rifle and drilled into the screw head, and then used a screw extractor held in a tap handle to back it out.


While I had the rifle open I also replaced the lever spring screws. A trick to reduce tension on these so you can move them is to slide the lever springs to the side. This worked for the right hand screw but not the left one. So, back to the mill.


This time I put the screw extractor in the drill chuck and manually rotated it (my mill cannot rotate to the left).


After reassembling the rifle I adjusted the tension on the lever so that it's a little easier to work than before but still holds the lever up.

I won't be disassembling the rifle regularly. Even when fired with black powder cartridges, the .38-40's thin brass seals the chamber very well. Virtually no fouling makes it into the action. (The same goes for .44-40, which I shoot in an 1860 Henry and 1873 Sporting Rifle.) However, I can now easily get into the action should it be needed for repair.

Sunday, June 21, 2015

Lathe Cross Slide Digital Readout

Over on Dave Markowitz's Machine Shop, I posted a short piece on how I added a digital readout (DRO) to my mini lathe.


This should make it a lot easier to turn stock down the desired diameter.

Link.

Saturday, May 23, 2015

Redneck Lathe DRO

Having digital read outs (DROs) on my mill has spoiled me, so I've been wanting to add them to my lathe. One idea I've seen has been to adapt inexpensive digital tire depth gauges bought on eBay for under $10. I tried this out tonight. Here's my proof of concept redneck lathe DRO:


I setup the lathe with a 3/4" diameter aluminum rod in the chuck and the DRO affixed to the saddle and cross slide with magnets. My goal was to turn the rod down to 1/2", which would require advancing the tool 1/8". (When turning down stock in lathe, since you're cutting a rotating piece, you divide the amount you want to remove in half, then move the cutting tool that amount. E.g., 0.75" - 0.5" = 0.25" to remove, thus you move the cutter in 0.125", or 1/8".)

Unfortunately, it's not going to work, as it's not accurate enough. I turned the stock down until the DRO read that I'd moved the cutter in 0.125", but when I measured the rod, I got 0.490". It was off by 1/1000" over such a small distance, which in metalworking terms is too coarse.

I'm going to go ahead and try the iGaging DROs, which a lot of mini mill and mini lathe owners have had good results with. I'm planning to install one for the cross slide and another for the compound.

Wednesday, May 20, 2015

Cut My First Single Point Threads

I'll be adding info about this to my machining site, but thought it was worth posting here as well.

Tonight I cut my first single point threads on my mini lathe. One of the advantages that the Chinese-made mini lathes have over the American-made Sherlines and Taigs is that they can be used for thread cutting without any additional attachments. To setup the lathe to cut threads at the desired pitch, you change gears in the headstock. A good explanation of the procedure can be found in the Little Machine Shop Mini Lathe User's Guide (PDF).

After finding my change gears and the reading the threading section of the LMS guide, I was able to cut 1/2x28 threads on the end of this 1/2" 6061 aluminum rod:


1/2x28 is of course the standard thread used for muzzle devices on .22s and 5.56mm firearms. E.g., my Ruger 22/45 Lite's barrel is threaded 1/2x28.

The cutting tool I used was from a set that I got at Harbor Freight shortly after I bought the lathe, with 1/4" shanks. I used some Tap Magic as cutting fluid but I probably could have cut these threads dry. (I've used a lot of WD-40 as cutting fluid when working with aluminum since I got my lathe and mill in 2013.)

Since I'm just learning how to thread on the lathe and wanted to reduce the risk of crashing the tool into the chuck, I got a spindle hand crank from Little Machine Shop. It fits into the spindle the same way a bicycle handlebar stem goes into the head tube.


Aside from safety, the spindle hand crank gives you lots of low speed torque. However, if I ever want to thread a barrel I'll have to do it under power, because the hand crank blocks the spindle bore.

Also shown in the above pics is a chip tray that I fashioned from some sheet steel and attached to the cross slide using a couple existing holes. I ran across this mod on the web somewhere and thought it was a good idea. It should keep the ways a bit cleaner. Here's a better view:


If the chip tray gets in the way of a job it can be easily removed.

Saturday, March 28, 2015

Winchester Model 1902 Thumb Trigger Rifle

I ran across this video by MidwayUSA showing the Winchester Model 1902 Thumb Trigger .22 rifle. This was made in the early 20th Century as a boy’s rifle. The video nicely explains how the rifle works including a close up of the mechanism.

It looks like it wouldn’t be too difficult to make one of these on a mini lathe and mill, and you could get by without the mill as long as you had a drill, some files, and patience.

Tuesday, March 10, 2015

A 3D Printed Ruger 10/22 Receiver

Linky:

http://www.printedfirearm.com/3d-printed-ruger-10-22-rifle-step-by-step/

Some cleanup work was done on a mill, but given that the receiver is plastic it could probably be done with hand tools.

Edit: Welcome Twitter readers! Please poke around my blog. If you found this post interesting there's lot's more about guns, the Second Amendment, politics, and computing topics.

Saturday, December 28, 2013

My Frankenstein AR15

Yesterday I received the PSA AR15 lower build kit that I’d ordered from Amazon and built of the lower receiver that I milled out from an 80% unit. The Spike’s Tactical mid-length upper that I ordered for it from AIM Surplus has arrived yet, so to test fire the lower I mated it with the top half of my Colt 6520.

Sorry for the pic in potato-vision.

I shot it this morning at the monthly Langhorne Rod & Gun Club practical rifle match. At the December match they allow for sighting in of new rifles and optics, and so they let me put a few downrange during this time to function test it. The rifle ran fine so I shot it in the match. (I brought the Colt lower just in case there was a problem but thankfully I was able to leave it in the case.) So far I have close to 90 rounds on the lower and it’s looking good. Zero malfs.

The Spike’s upper should arrive Monday and I’ll post a follow up pic after it’s all together. Initially, I’ll need to run it with irons using the carry handle from my Colt 6721. For an optic, I am pretty set on getting a low power variable such as a Burris Tac 30 or Nikon M-223.

Wednesday, November 06, 2013

A Small Lathe Built in a Japanese Prison Camp

I’ve been doing some preliminary research into silencer designs prior to filing my first Form 1, and ran across this article about a small lathe made by a British POW being held in a WW2 Japanese prison camp. Link to ~1.1 meg PDF.

This lathe was quite a bit smaller than the modern Chinese lathes made by Sieg and Real Bull, and which are commonly derided as toys. Yet, the author of the article made good use of it, fabricating parts for artificial limbs, among other things.

There’s something to be said for picking up and learning how to use a lathe as part of your preps. It could come in useful in the event of an economic depression when manufactured items become hard to get and it’s a tool with which to earn some extra cash.

Sources for the modern mini lathes include Harbor Freight, Grizzly, Little Machine Shop, and Big Dog Metal Works. Also check out mini-lathe.com for more info.

Tuesday, June 25, 2013

Crosman 2300T Improved Front Sight

Over the weekend I used my new lathe and my mill to make a nicer front sight for my Crosman 2300T. Details here.


Monday, June 10, 2013

Machine Shop Update

On Saturday I completed the installation of digital read outs (DROs) on my Grizzly G8689 mini mill. Previously, I'd installed a belt drive conversion from Little Machine Shop. The DROs will enable me to make much more precise cuts, while the belt drive conversion made the mill a lot quieter, smoother running, and increased the top RPM to 4300 should I ever need it. Both are worthwhile mods, IMO.

However, a lathe is still the basic machine tool to have in a machine shop. After much additional online research today I ordered a Big Dog 7x14 benchtop lathe. Unlike most of the benchtop hobby lathes on the US market, this one is made by Yangzhou Real Bull, rather than Sieg. Included feature and accessories are a digital RPM display, lever lock tail stock, a steady rest, a follow rest, tail stock chuck and a live center, 4" four-jaw chuck, and metal transmission gears. I still have the lathe tool kit that I ordered when I placed my original order with Grizzly, so I should be able to get up and running with it immediately.

Delivery should take 5 - 10 days, after which I'll post a review.

Saturday, June 01, 2013

Home Machining Website

I decided that the format of a blog isn't ideal for documenting the work I'm doing in my home machine shop. So, I created a site using Google Sites, Dave Markowitz's Machine Shop. I will be documenting various projects there. So far, these include doing a belt drive conversion on my Grizzly Mini Mill, and adding digital readouts, which is currently a work in progress.

I hope you'll check it out.


Saturday, May 18, 2013

Milling Using a Chuck vs. Collets

The Sieg X2 Mini Mills like my Grizzly G8689 come with drill chucks. The Grizzly and some other brands also come with collets for holding end mills, while the Harbor Freight version comes only with a drill chuck, as far as I know. Today, I tried doing some milling using the chuck to hold an end mill, because I wanted the extra reach it provided.

Compared with a collet, the chuck is noticeably less rigid and watching the mill rotate, it also looks like it hold the end mill less concentrically. I.e., there's some noticeable wobble.

Based on this brief experience, collets are much better than the drill chuck for milling. End mill holders are another option, but I have no experience with them.

Friday, May 17, 2013

Forbes: Why 3D-Printed Untraceable Guns Could Be Good

Forbes is running an op-ed about why untraceable guns created on 3D printers could be good for the US.

...
Although the technology is still in its infancy, Wilson’s innovation has already sparked heated debate. Some gun rights advocates (including Wilson) argue this means current gun laws will soon be obsolete. They welcome the fact that home hobbyists may soon be able to build functioning firearms without any background check or government record. Others are alarmed, concerned that this would enable criminals to more easily obtain firearms. Congressman Steve Israel has already stated his intent to modify current laws to ban such guns.
However, Congressman Israel may be too late. Once thousands of motivated hobbyists start downloading open source gun designs and posting their refinements, we’ll likely see rapid technical advances. But Cody Wilson’s real impact on America may not be technological but political — and in a good way.
...


Read the whole thing.

I agree with Hsieh. If there is one thing we can learn from 20th Century history, it is that governments cannot be trusted with a monopoly of force. While it has always been legal for Americans to make untraceable guns for their own use, 3D printing lowers the entry bar, especially since traditional shop classes have been on the wain in American schools, while a larger number of people have developed computer skills. 3D printing will make home manufacture of firearms more accessible to the masses, especially as the technology matures.

That said, for those like myself willing to learn basic machine shop skills, fully functional firearms can be made at home with equipment within reach of most of the middle class. Small milling machines and lathes are available at prices under $1,000 each. For a modest additional expenditure, they can be made more precise with digital readouts, and for another grand or so can by CNC-enabled.

To would-be tyrants like Steve King, Charles Schumer, and Dianne Feinstein: You can't stop the signal.

Thursday, May 16, 2013

Belt Drive Conversion for Grizzly Mini Mill

Now that I've been using my Grizzly G8689 (Sieg X2) mini mill for a few weeks, I've decided to do a belt drive conversion on it. The plastic gear drive system on the mill has two main disadvantages:

1. It's very noisy.
2. It's prone to breakage, from what I've read in many places.

Little Machine Shop has a belt drive conversion kit which remedies both issues. I ordered one, along with a spare belt this afternoon. They should arrive some time next week.

The next improvement to the mill will be adding digital read outs for all three axes. I bought the DRO plans from Fignoggle Designs, but I'm still debating whether to use them or go with a cheaper solution. E.g., just get a set of iGaging scales with remote readouts. Comments and suggestions are welcome.


Wednesday, April 17, 2013

You have to start somewhere

Last night I used my new milling machine for the first time. Since I'm new at this I am starting with the basics. I cut a couple inches off the end of a scrap 2x4 and milled it so that the adjacent sides are perpendicular and opposite sides are parallel.


On the way home from work last night I picked up a piece of 1/8" thick aluminum, and a piece of 1/8" thick hot rolled steel. If I have time tonight I'll look into making a flat square and/or slots in the material.